Tuesday 26 June 2012

...So this is how it all started...

My First Quilt With Matching Pillows
...I was at Aunt Liz's, looking at patterns and was interested in starting a quilt.  A co-worker was kind enough to hook me up with some free patterns from the dear old friend, Internet.  I took that pattern to a shop with Aunt Liz, and picked out the above fabric.  I bought what the pattern said and was blown away at the cost.  Mostly because it was just the fabric to complete the top of a 'lap quilt' and it was suppose to be 'on sale'.  Regardless I was eager to try this out.


So I sat for hours, trying to master the rotary cutter, rulers, mats and figuring out this whole thing from vague instructions (at the time I didn't realize how horrible they were, until I was in the thick of it).  I had already decided when I picked out the fabric to complete this project for my Mom.  I had picked out the colors, keeping in mind something country, something spa and something not so crazy.  It took me long enough to complete this little lap thing, with way to much fabric left over.  Aunt Liz again helped me in the process of learning to sandwich the layers and quilt it together.  Nothing was square when I was done, and we were doing our best to make it work.  I had no idea about 'squaring up' before sewing each block together.  Clearly a very valuable lesson learned.


Mom's Christmas Pillows
So nearly a year later, I decided to use the lefty over fabric and create my mother some matching pillows, as you see above.  She was thrilled to get these, as she greatly loved the ones I had given her at Christmas.  The fabric I had also picked out at the same time I bought the quilt fabric, I guess I knew I was going to like doing this.  The reason for the pillows was because my mother ALWAYS had these thing pancakes she claims were pillows.  So I wanted there to be something nice the next time I visited, you know, pillows, not pancakes. (You make think I am exaggerating calling them pancakes, but they literally were only 1/2 inch thick!)  


So this was my FIRST EVER quilt and the start of all other things to come....the fabric stash, the upgrade in machine, numberous classes to learn and do more, time at Aunt Liz's and trying to share the quilting love with my loved ones.  The pillows, they were my 3rd through to 6th pillow, and I have yet to finish the other 2 that are here for me....one of these days....

Friday 22 June 2012


'Sea Glass'


I saw this fabric and instantly thought of home and spending hours on the beach collecting beach glass with my mom.  I now find myself looking for beach glass anytime I am on a beach.  I have been able to bring her back sea glass from the Bahamas, I think she enjoyed that.


I couldn't decide what color I liked most, so one side is blue, the other side is green :)  These are what I call hot chocolate mats, or mats for tea and crumpets if you prefer.

Monday 18 June 2012

'Around The Block'


Time to Square it up!
So the class was called 'Slideshow', but by the time I finished this quilt, I felt like I had been around the block a few times!  I started this quilt in Jan, the first class was suppose to start when I was making a 17hr road trip home for my Grampy's funeral.   So the quilt cutting was off to an emotional start and I had to do the cutting at home to be ready for the next quilt class.  This is a Queen Quilt, measuring roughly 102 inches wide.

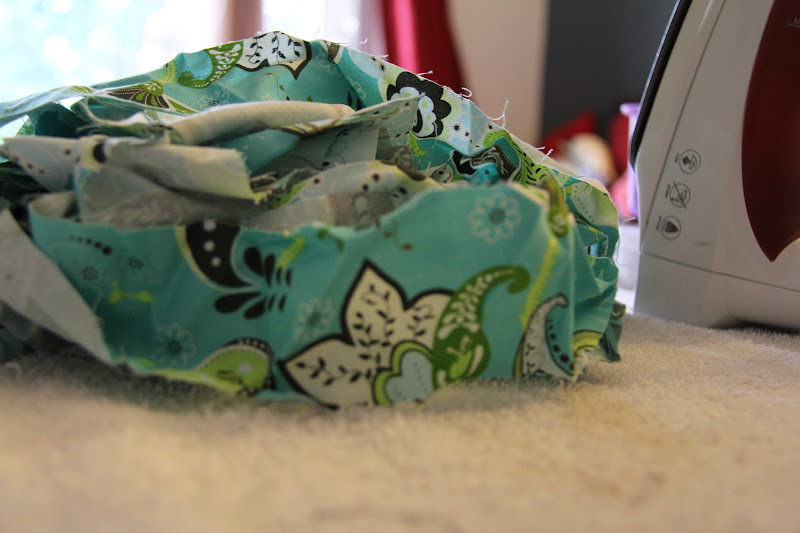
The binding, in need of pressing
As I kept working on the quilt, it's story kept growing.  By about March Break, I had sections completed, but they had to be pressed and sewn together to make a completed top.  It was at this time that beer got spilled on the one corner of the quilt.  I have to admit, there was a lot of cutting, sewing and pressing involved in getting the top of this quilt completed!  So after getting that far, I decided I wanted a break from it before I would go quilt it together at my Aunt Liz's place.

The start of the pressed binding
Two weekends ago, I went Aunt Liz's place to get her help and learn how to use her long arm sewing machine.  The machine requires you to roll each layer up on a spool, and it took us 4 times to get the quilt top rolled correctly.  I guess if we had of watched the intructional video closer, we would have not made that error so many times.  So we are on a roll, I have quilted about a food of fabric together, only to notice something is wrong.  We are getting thread balling up on the back side, and it's just revealed itself to me.  We spent the rest of the afternoon picking out the stitches I just put in and gather up loose thread.


A look at the free motion pattern
Well, we started the process at 11am, now it's supper time and we can't solve the problem behind the thread balls.  So we give it a break, eat and go back at problem solving.  We have it working, it's now 8pm and I am on a roll free motion quilting this puppy together.  I completed the last stitch at roughly 1:30 am!  Bed time!  I must say though, Aunt Liz and I had a great time working on it, laughing our time away and chatting.  I am happy to spend that time with her, and in turn motivate her to complete some of hers she has sitting and waiting to be quilted.


A peek at the backing
I have now squared up the quilt, and put it's binding on it!  How sweet it is!  I did decided to try machine binding the quilt binding on this time.  It was a snap, and the quilt was ready about a week sooner than it would have been hand sewing it.  A week is likely pushing it, might have taken the rest of the summer, I mean, let's be honest!  It's big, and warm to have on your lap, so who wants to do that in the summer heat?!

This quilt is currenlty in the wash, remember the beer that is on it, eeeewww.  I look forward to having it on my bed tonight :)  My first queen quilt, my first free motion quilt, my first long arm quilt and my first machine binding quilt!  All of these firsts have certainly helped me to grow as a quilter!

Yay!  It's done!


Saturday 16 June 2012

An Evening Cut, A Morning Stitch!

Fabric I was given


Ok, so this is a tea towel project that was bought for me by Aunt Liz from one of her quilting shops.  I have had it since about Dec, and finally decided to complete this one.  I now have a Fall and Christmas one waiting to be done.  I really loved the colors!


What I did Last Night

The Process to make this is called Applique.  It requires me to trace out the design onto a special paper that has a glue based back on it.  I then stick that to the fabric swatches above and lightly iron to adhere them.  Then I can cut it out, peel off the other backing and set it in place on the towel.  I kept playing around with it until I was happy, then I ironed it to secure it in place.
What I did during my morning coffee.

Finished project

 After that, I had to blanket stitch around each edge of fabric.  This is something new to me, as my old machine didn't have this stitch.  So this was in fact my 3rd applique project, but my first on this machine!    When I was done, there were two little crystals to secure in place on the water drops.  Now, they didn't tell me how to do that, (instructions were only the diagram) so I dug out some super glue and put them on.  This isn't going to be a regular use towel anyhow, so I don't anticipate it having many washes to go through.  But it sure looks nice in my kitchen!


Friday 15 June 2012

I'll Be Stitched!


I took on the task of making my brother an apron because he loves to cook.  The hard part is, he is 6' 4", so most aprons are just small looking.  I also know my brother loves his cocktails and mixing up ones for his company.  I actually picked up this martini glass stuff in the US with him in mind, but no idea of what I would make.


So my lovely husband was kind enough to model the apron for pictures, before I gifted it to my brother.  The first picture, and first side, Is what I call the 'drink mixing' apron.  The other side, well, it's the 'How many have I had' side.  My husband is close enough in height to my brother, and I like where it comes.  I know my brother is like me, and we like to wipe our hands on our thighs.  I also gave him a single pocket, mostly for stuffing that towel or the handle of a spatula.


Thursday 14 June 2012

'The Family Tree'

The quilt name is suiting based on the history attached to this quilt!  This is the quilt my Mother started back around 1977 with her mother-in-law.  I think the best part of this quilt, is that it was made with all old fabrics that they had laying around.  Anything from towels, sheets to clothes.  Mom cut it all out with scissors and sewed it on an old Singer Treadle Machine.  I remember spending many hours playing on that treadle.  The creative things you can make that treadle become!

I came across this top when going through some belongings in my Mother's house.  I asked about it and she told me how she made it.  I assume she never finished it, because that would have meant putting it on a quilting frame in the living room and doing it by hand.  So I asked if I could finish it for her, and she said yes. There is a much lager one, that i will someday finish up for her too, but this one was more important to finish quickly.

So I had decided to make a quilt for my Grandmother (my Mother's Mom), so that she could keep her legs warm while in her wheelchair, and have something that can provide some tactile sensory.  So I knew Gran liked her last soft blanket and that maybe old fabrics might remind her of her childhood.  It was in this thought process that it dawned on me to use the quilt to my Mother had made and attach it to a soft backing.

I have sewn on a very soft 'Minky' backing, and left out putting in batting.  I opted to Free Motion it it a swirly pattern, to help give it a pucker texture, which in turn would help to make the not so square squares look better.  As always, I have hand sewn the binding on, I don't find the machine sewn ones look as clean.  This is the first project that I have also included a handwritten label on, that is fade-proof and washable.  It will be on it's way to my Mother at the end of the month, so she can hand deliver it to her Mom and tell her the story and read her the label.  I am SO excited!

Tuesday 12 June 2012

Sew What....Have Some Fun


So there are a few ways you can 'quilt' the layers of fabric together.  The technique I have just learned is called Free Motion.  Needless to say, I feel in love with it the moment I tried it and started exploring.  I have a natural knack for it, likely because I am always doodling on paper.  So this is just a fancy way of doodling with the use of a sewing machine.  I just sort of go with what my hands make, and keep going with the flow. I found that the more I thought, the more rigid it looked.  So having fun and relaxing into it was key for me.
Please bare in mind, I was using some super cheap fabric I picked up from Walmart for these practices.  Why waste the expensive stuff on playing around I figure.  Some of the 'styles' have interesting names.  The first picture has some leaves and swirls I was trying out.  Th e next picture shows something called 'garlic cloves'.  However, to me they look more like a clam shell or something.  Then, you can see some flames, which could be really fun done in the right thread on black fabric!
Next I tried out what she called 'waves' but I kind of see it as more of a cameo pattern.  Call it what you will, it was soothing and simple to sew.  Then below that I started to go with only making straight lines.  Now in free motion, that means I have to have a steady hand movement, because the machine is not helping me at all here.  I think it was pretty good for my first time.  Then I tried some leaves with berries, and a flower.

Then of course I started to really relax into it and have some fun.  By the time my instructor came back from helping answer someone's question, I had sewn the following picture.  Yip, I had sewn a version of my instructor.  Then I decided to try out the alphabet!  It was actually rather fun to do, here is part of it!
I must be off though, I have some sewing prep to do before tomorrow nights class (working on a queen size quilt and it's taking lots of time!)  


Monday 11 June 2012

The First Stitch Is The Sweetest!

Welcome to 'Go Stitch Yourself'.

This blog is to help family, friends anyone else see my sewing projects, start to finish.  I hope that you will enjoy the finished projects as much as me, and maybe laugh along with me at mistakes and mishaps in the making of the project.

If anyone was to walk into my small house right now, you would know a quilter lived here!  Bins of quilt tops waiting their turn to be stitched up!  Fabric and patterns waiting to be cut and sewn!  I only started into quilting a year ago and have already had to upgrade to a better machine so that I can do the fancier things.  But sewing is something I did a little of at university.  Sometimes by hand, sometimes with the little dress maker machine (which I ended up killing I used it so much).  I remember telling someone I was getting into quilting and sewing a year ago, and they just said to me "Why, it's cheaper to buy a quilt".  My response is, because it is way more fun to make one (maybe not to you, but to me it is), the reward is greater and I love the story that it can tell.  One thing I have been trying to do, is name my quilts.  Not based on their  Patterns Name, but based on the story of that quilt.  Stick with my blog long enough, and you will soon start to see what I mean.
A Piece of Home!

I will post as often as I can, but understand that projects can't all be done in a day!  I just quilted together a quilt that I had done in January, but didn't have the ability to finished until this weekend.  Finished is an operative word, as it still needs it's binding put on.  I also have a quilt my mom started in circa 1977, and it is in queue to be finished.